An optimist will tell you the glass is half-full; the pessimist, half-empty; and the engineer will tell you the glass is twice the size it needs to be. – Oscar Wilde
Monday, October 05, 2009
Fly pumpkin fly, on the road to victory...
When carving a pumpkin, what shape or form could you leave upon it that would be more ghoulishly frightening then the Philadelphia Eagles football team? The answer is none. None more frightening. Opposing teams...neh, ALL... shutter with fear in their presence.
Not quite sure why I did this but the idea popped into my head last week to put the "Eagles" logo on a pumpkin so I went for it. It's actually a fake pumpkin and the logo is more etched than carved but the effect is the same and this one won't end up a rotten mess in a couple weeks. Check out the second picture with the 'kin lighted from the inside.
If you want to make something similar, here's what you do. First ya gotta find a pattern that strikes your fancy. Obviously a black and white picture with moderate detail would work best. You'll be etching out the white parts so make sure it has a black border. Next comes finding a fumpkin (fake pumpkin) that is the appropriate size. AC Moore or Michaels has a decent selection. Even though my logo is more wide than tall I went with a tall fumpkin cause it felt more traditional to me. Print out your picture, scaled to your liking, and tape it on securely. Starting from the inside out, use an exacto knife or pin to cut through the paper into the fumpkin where black meets white. After the image is thoroughly traced, remove the paper and clean it up a little. Now comes the fun part. Ideally, you'd use a dremel with a small engraving bit to clear away the orange skin but any sharp cutting tool will work. To top it off, cut a softball sized hole in the bottom and apply some light. A candle would be a very BAD idea since the foam fumpkin is most likely flammable.
Happy Halloween campers!
Sunday, August 16, 2009
Proposal
There are many things to consider when proposing to your girlfriend. Some of more importance than others. I'd guess the ring delivery system is probably pretty low on most people's priority lists. But apparently not on mine. I wanted to find a way to make this proposal unique, make it personal and memorable. Short of implanting a light source in the ring, making an over the top jewelry box to house the ring seemed like the right thing to do. You'll want to check out the video for full effect. Oh BTW, she said yes!
Wednesday, June 03, 2009
Draft Beer at the Homestead.
If you want, you can purchase a kegerator from any number of locations. However, if you haven't figured it out by now, that's just not my way. I endeavored to give my beer dispensing refrigerator a bit of home brew style much like the beverage I hope to create for it one day. Turns out, the hardest part of the process was finding a suitable chiller. Most mini fridges these days are designed with the cooling element at the top and the compressor at the rear-bottom of the inner compartment. This arrangement is not conducive to the measurements of a 1/4 barrel keg. Fortunately, I found just the right model at Walmart online. (Danby Mini Fridge Model# DAR440BL). You'll need it shipped to a store near you. It had a flat cooling plate oriented along the backside of the interior. However, a bit of modification was still needed to ensure the proper opening.
I began by removing the plastic injection molded panel from the inside of the door. An electric screwdriver made short work of this. Needing to maintain the suddenly absent vapor barrier, I cut a sheet of 1/8" lexan to size and drilled the appropriate holes. Looking back, I really should have done something to cover the visually exposed insulation in the door. But it's on the inside so it really doesn't matter that much to me. Now that I had the required interior dimensions, it was time to create an opening for the liquid hose and design up a riser/keg tower to house the tap and shank. I like the industrial look of cast iron pipe and thought it appropriate given the nature of what I was building. And the flanges were convenient because they terminated the pipe nicely as well as provided a great connection point to the fridge and shank adapter. At 3/4", the pipe was wide enough to snugly fit both the 1/4" clear plastic tubing and 1/4" foam insulation. Gotta keep that beer cool.
I had the round white shank adapter machined as more a placeholder than permanent design element. Though I've come to like it. It's clean and makes a good transition between the pipe and faucet. My original thought was to create an electronic display using that space. It would house readouts for temperature and remaining beer. I'll make that one day but not until I finish a couple other projects on the drawing board. At the moment, having ice cold beer on tap is good enough for me.
Monday, April 20, 2009
I'm crazy bout those cupcakes cousin.
There are many places to find out about local/popular eateries around town... weekend insert, internet, word of mouth, doorknob hangers, etc. Personally, I prefer Lonely Island SNL Digital Shorts for all my foody info. Check out "Lazy Sunday" to see what I'm talking about. Deb and I hit up NYC recently to see some friends and do some exploring. While there are many cultural and historic sights to see, Magnolia was definitely on the top of my short list of things to do. If you ever find yourself in the city, do me a favor. Get yourself some cupcakes and a carton of milk. Pick a cushy swaft of grass and chow down. You can't go wrong, I promise you. But be prepared to stand in line. The place can only fit like eight people, six if they really like cupcakes. Wasn't too bad though, well worth the wait.
Monday, February 23, 2009
Framed on V-Day
So I sort of took the easy way out this Christmas and bought my girlfriend a TV. She subsequently upgraded to an HD signal in her apartment and it looks great but I can't help but feel the gift lacked a little heart. I wanted to make up for that a little this Valentine's Day. We have accumulated a lot of silly pictures of us over the last couple years and I've had the idea of putting them all on a digital picture frame for some time now. Alone, that would have been a step in the right direction but I knew I could do better. While perusing the capabilities of some online machine shops, I came up with the idea of combining said digital picture frame with a custom front bezel. And why not throw a few tri-color LED's in there for good measure. Check out the video for some cool multicolor animation action.
This project took me way more time than I initially imagined. Good thing I started it more than a month before Valentines Day. Choosing the digiframe was not a trivial task. Most of the frames I found where either undersized for my taste or large, expensive and wide screen. I guess the wide aspect screen is good for HD video resolutions but I'd wager most people are going to go primarily with digitized photos which are almost entirely produced with a 4:3 resolution aspect ratio. After a pretty good search, I found an adequate candidate in an 8" Matsunichi model. I took a bit of a gamble with a non name brand selection but that ended up working in my favor since the flimsy construction made ripping it apart pretty easy. And the screen turned out to be just as bright as the reviews said it would... Bonus.
Check this out, I used a friggin laser to cut the letters out of the front bezel. Would have been a lot cooler if not for the smell of burnt plastic. A friggin laser! The rest of the outer casing came together with some high strength plastic glue and screws. And then came the programming. I hacked together some of the ugliest code you can imagine. I really need some training in proper coding techniques. Yikes. But the end result looks pretty good so I'm happy. Though I think during "Randy Jackson presents America's Best Dance Crew" she likes the TV just a little bit more.
Friday, January 16, 2009
Hardly Breck a Sweat
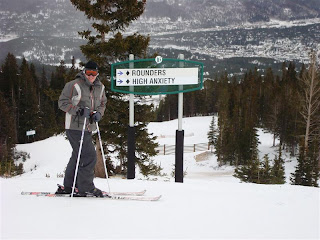
Headed out to hit the slopes in Colorado a few weeks ago. Breckenridge to be exact. I had been there a few years back with my sister but it was during the summer and I was curious about what the town and mountain would be like during ski season. Back then, my sister and I stayed at a hostel a few blocks from the center of town and it turned out to be more of a bed and breakfast than the simple accommodations I was looking forward to. I had formed this idea of a hostel in my head and wanted to realize it by arriving to a young crowd of travelers sharing stories and experiences. A community of strangers you could say. I guess that sort of thing appeals to me. Instead, the place was very comfortable, very spacious and the party sized jacuzzi was very hot. It was a good consolation prize and a clue to the kind of clientele the town catered to. Although the aesthetic is very upscale, Breckenridge still manages to keep that old town mountain village feel mostly because it was built over an old town mountain village. I remembered checking out the people on the restaurant and coffee shop lined streets thinking it was yuppie central. Totally not my crowd, but where there are yuppies there is ease and comfort. Prefect for a no hassle ski weekend out west. And the snow usually brings out the adventurous types anyway so problem solved. Neat town, cool people, big ol hill, close to Denver International... choosing Breck was easy.
The conditions on the mountain weren't optimal and not all the runs were open the first couple days we were there but I still had a grand ol time on my skis. It's hard to say what ability of skier I am. Sometimes I feel like I'm in the advanced category and sometimes, like on the diamond glade runs up on Lift 6, it's like I'm putting skis on for the first time. Breck goes from intermediate to expert in a flash with little in between. Not all that bad for families or those into cruisers I suppose. Though I would have preferred something a bit more challenging without having to negotiate mogals and pine trees on near vertical descents. My ego is still bruised. But I'm nitpicking, there was a lot of variety and when peak 10 opened up we had our fill of great views and great all around skiing.
Breckenridge has way more upside than any downs I can think of. I'd recommend it to anyone. I wish I could go into detail about all the wonderful places to go and eat but we had fun finding them on our own so I wouldn't take that experience from you. Just talk to all the friendly people on the street and in the hotel and you'll have an easy time. I'm already looking forward to my next ski trip our west... whatever that may be.
Thursday, January 08, 2009
Santa with style
A popular event during the holiday season around the DC Metro area is a Santa bar crawl, though I'm sure this sort of thing happens all over the place. The premise is simple, dress up like Santa, an elf, Christmas tree or maybe even Rudolph and head on out to your favorite bars. Since the elements of the Santa myth are a hosh posh of traditions from various religions, this outing can appeal to persons of any religious background.
I chose to class up the tired ol Santa shirt a little and reconfigure it into a Santa suit jacket. But this is still a pretty low key event so I accessorized with the Santa ball cap I made for last year's crawl. Although time intensive, the hat was pretty easy to put together. I took an old baseball hat I had laying around and covered it with the fabric from two Santa hats. An Exacto Knife with a very sharp blade made short work of the de-stitching duties. Totally necessary to maximize fabric coverage. And of course, attaching the fabric to the hat was a breeze with hot glue... what else. Now, the jacket was a completely different story. First, I bought a generic Santa costume from Party City and a swath of white fuzzy fabric along with a few buttons and some thread from Jo-Anne Crafts. I proceeded to de-stitch the whole Santa coat so I could adjust the measurements. I used one of my sport jackets for size comparison. After a little scissor work and a ton of hand sewing (and hot glue), the jacket was born. Originally I didn't attach the bottom trim thinking that it would look more like a coat than a suit jacket, but the red felt from the Santa suit is too thin to create an adequate border even when doubled over so I opted for it. I think that was the right decision.
Subscribe to:
Posts (Atom)